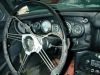
My 1969 MGC GT #8806
I've been wanting to build an MG for my wife for a while. We had in fact purchased a 1970 BGT that was going to be hers, but there turned out to be problems with the title. Then this car came along. It needs about the same amount of work that the BGT would have needed, but the end result will be a better car. Follow along as it progresses.
2010
-
January
Starting up again!
The annual American MGC Register event, the "'C' Event of Brutal Aggressives," otherwise known as the "CBA," will be in Asheville, NC, this year. It runs from 16-20 June. I want this car to be there!
So, I pushed the car into the garage (oh yeah -- I now have a garage) a couple of weeks ago and I'm resuming work. So far I've had the master cylinder rebuilt by White Post Restorations, ordered some other hydraulic bits as well as fuel system parts, changed all the fluids, and put in a battery. Not a tremendous start, but drop by drop, the ocean is filled.
The next step is to bolt on all the bits that I've got so that I have working brakes (sans boosters -- still thinking on that), a clutch, and a running engine. I assume the engine still runs. I haven't started it since New Year's Day, 2006. But I've confirmed that the engine is not seized, so it should be good to go.
This goal is probably no less aggressive than the one I set back in 2006 to get to Gatlinburg and MG2006, but I had an epiphany: It doesn't have to look good. It just needs to get there! I may squirt some black primer on so that it's all one color and call it a rat rod. ;-)
2006
-
March
Throwing in the towel.
I started removing the right side floor. It was in about the same shape as the left, but I discovered that the triangular "frame" member under the floor was rotten enough that I felt it needed to be repaired. I'm working outside, on the ground, so I decided that it was too much to tackle right now. Rather than rush the job, I reluctantly declared that the C wouldn't go to Gatlinburg. Instead, I started in on the B. The C will have to languish in the yard a while longer....
-
February - March
The floors on both sides were rotted. Interestingly, they were both rotted on the right side, so I think the car spent some time sitting on a slope, with the left side higher than the right. Here's a sequence of photos as I replace the left floorboard. The rust was pretty bad, and extended up the tunnel near the accelerator pedal. (1) I cut out the floor and about 4" of the tunnel. (2) I had a cut from an MGB to repair the tunnel, but the bit I got did not include the "bubble" that's beside and above the accelerator pedal, so I made my own from flat stock. (3, 4) The replacement floorboards you get are not great, but I think there's only one company making them. (5) Rather than weld in the panel, I decided to use an automotive panel adhesive. I fastened it down with sheet metal screws and a clamp whilst the glue set. Here's the clamp. (6) And finally, the floor installed. (7) I've since painted it with POR-15.

1

2

3

4

5

6

7


2005
-
November 13
More rust! This the right side of the heater shelf, underneath one of the brake boosters (for folks not in the US, NA-spec cars had dual circuit brakes with two brake boosters: one for the front brakes and one for the rears). The booster leaked, and the DPO plumbed around it and removed it from the circuit but left it in place. He removed the other one. The resulting non-performance of the brakes handily explains the condition of the grille and front edge of the bonnet. Anyway, the years of highly-hydroscopic brake fluid eating the paint and slurping up atmospheric moisture took its toll with the results you see here. This is going to take some doing to repair, simply because it's such an awkward place. BTW -- the second photo is from the outboard side of the car, through a port-hole I cut into the inner fender (which was also rusted).


-
Oct 30 - Nov 1
More Progess! Started in on the cargo floor. Here are some before and during shots. I haven't taken any afters yet, but the current status is that the new piece is welded in and the whole thing has been painted with POR-15. I ended up buying a new Heritage panel and using the right third of it. It looks better in person than in the photo.


-
October 28
There's been minor progress on the MGC GT -- I dragged it up from the shed to the house! The plan is to start working on it (assuming I ever have time away from work again) in preparation for driving it to MG2006. It's an ambition goal. We'll see how it goes....


-
August
We moved into a new house. For now, the C has to live in a shed built off a little barn on the far side of the property. It's gonna be a hike out there to it, and there's no power out there. I don't think there will be much progress whilst it's out there. But, the plan is build a garage.... SOON!


2003
-
November
I had intended to rebuild the heater assembly and set it aside until I was ready for it. I took it apart and cleaned it up, but it was rough. I ended up painting it and putting it in the MGB. I'll rehab the B's heater and use it in the C. If you want to see how it cleaned up, surf on over the the B page -- there are a few pictures.
While I was painting, I decided the try to stabilise the big rusty area on the roof. I hit it with the angle grinder and a Scotchbrite pad to get the big chucks off and to feather the paint back to sound metal, and shot it with some PPG K36 primer. My little Harbor Freight detail gun wasn't really up to the task, so it's a little splotchy. Since I plan on stripping the primer back off when I strip the rest of the car, I don't care. I just wanted to slow down the car's return to earth. Here's a shot, as well as one of the new wing (see below) set in place.


-
Aug 16
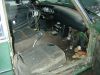
Worked a bit on stripping the interior. Removed the dash, the fresh air flap, and the right seat. Generally cleaned up inside. I was surprised at how much sound deadening there was -- especially in the deep wells outboard of the seat. They were filled flush with sheet tar sound deadening, almost 2" thick. In the footwell, the tar was overlayed with dense urethane foam. It was very carefully fitted, so I'm not sure if it's factory or a PO mod.


-
Aug 14
Bought two nice used '70 BGT wings -- much better than what was on the car.
-
May 31 - June 1
Progress is slow, but I'm getting there. Put two Maypops on the right side wheels to replace the Didpops that were on there...
Started pulling the wings. What fun! Of course the valance has to be unbolted from the wings, but to get to the valance bolts, the bumper should come off. The bumper arm bolts (that go into the frame) are practically inaccessible, but pulling them is preferable to removing the totally inaccessible overrider nuts. Then there are the Secret Bolts. If you've ever done a GT wing, you'll know the ones I'm referring to. To get to them requires pulling the dash (at least partially).
When I cut off the lower wing screws and pulled back the right wing, enough dirt poured out to repot a plant, and enough rust to... erm, do whatever it is one does with a lot of rust. The situation in there is better than I expected, however. The trumpets are sound. The outer sill is rotted (expected), but the inner seems sound when I probe it with a screwdriver. I'll know more once the outer sill is off. The wing itself is a bit dodgy, both from rust and from a previous ham-fisted repair. Has that "We'll paint any car any color, $99.99" look about it. There are dents that show hammering, but are still dents, so I'm not sure what the hammering was about. As well, there is Bondo over original paint (which shows no scuff-sanding). But, it looks like it might be salvageable.
The state of the left side is better. There was quite the rat's nest in there, and the very front of the outer sill is rotted, but the rest is sound.


-
March 15
Dropped the fuel tank. The tank turned out to be a breeze to remove. Much to my relief, the bolts and nuts weren't frozen. Also, the filler neck hose posed no problem as the filler neck tore off the tank with very little encouragement. Good job I've got a new tank waiting in the wings! If I can get a nice day I plan on painting the top of the new tank with POR-15, and painting the rest with spray-on truck bedliner.
The cargo area floor was not quite as good. The rightmost 25% or so is Swiss cheese. The one in the parts car looks good, but I don't know how much damage I'll do removing it. Moss list new ones for $160.00. So, I'm debating used vs new....
-
February 16
We got sleet and freezing rain today. Not a good day to be out in the driveway working. Instead, I took the opportunity to repair the horns. Initially, neither would sound. They're fairly easy to get going again, though. Have a look here for the general idea (2007: link removed because the page went away). The Lucas horns are a bit different, but not much. I had to drill the rivet heads and drift out the rivets to get into the horns, and I closed them back up with #6 x 1/2 in. machine screws and nuts. Then, a quick coat of paint and they're good as new.
-
January 5
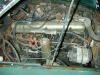
It runs! I ran a length fuel hose into a small gas can and gravity-fed fuel into the carbs. I ran it for about 10 minutes or so, but got alarmed when I saw that the exhaust donut gaskets were completely blown out and that the rear carb had a slow drip into the area around the exhaust flanges. I assumed that that was a Bad Thing so I shut it down until I can get those two leaks repaired.
-
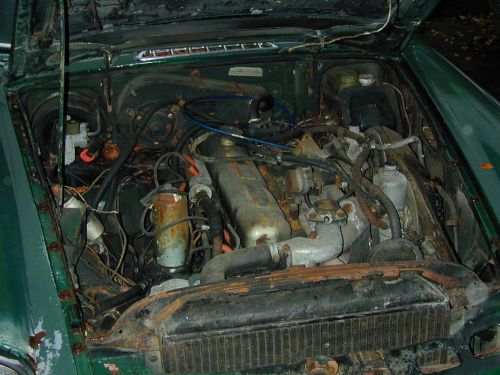
January 1-5
Backflushed radiator and cooling system, then reinstalled everything. I tore the gasket whilst installing the pump. Fortunately, I had traced the old one so it was simple to cut a new one. If you need the pattern, click the link below. The car was also missing its alignment dowels for the pump. I found a 36 in. stick of 1/4 in. steel rod at the local hardware store for less than $2.00. I cut two piece approximately 5/8 in. long, ground the ends a bit, and they worked great! Also pulled the water neck to check the thermostat. Thermostat was fine but tremendous amount of crud in passage.
Items required:
- 1 x GWP111 Water Pump (rebuilt)
- 1 x GRH539 Radiator Hose, Top
- 1 x GRH360 Radiator Hose, Bottom
- 1 x 12B1408 Bypass Hose
- 1 x 12B1446 Water Pump Gasket
- ?ft 1/4" Fuel Hose
- ?ft 3/4" Heater Hose
- Assorted Hose Clamps
- 1 x GTG101 Water Neck Gasket, at filler
- 1 x GTG103 Water Neck Gasket, neck to head (thermostat)
- 1 x 9430 Vbelt (Gates brand) (1/2 x 43 3/8 in.)
- 1 x GRC109 Expansion Tank Cap
- 1 x GRC201 Filler Neck Cap


2002
-
December
Cleaned it out. I filled a 30 gal. trash bag with CRAP! Evicted the mice.
Removed ignition cylinder and took it to a local locksmith to have a key made.
New battery and cables. It still had the tar-top 6v batteries in it. Replaced them with a single BCI Group 26 12v.
Oil and filter change. Squirted some Marvel Mystery Oil down the plug holes. Pulled the valve cover and squirted oil on the rockers and valves. Drained and refilled gearbox.
- 1 x Crosland 414 Oil Filter
- 1 x 37H1173 Cannister Bolt Sealing Washer
- 17.3 pts Castrol 20w50 GTX (engine)
- 7.2 pts Castrol 20w50 GTX (gearbox)
- 1 x GEG419 Valve cover Gasket
Cranked it until I got oil pressure. Quickly discovered that the water pump was seized. Removed belt.
Disasembled, cleaned, and reassembled distributor. Put in new points and low tension lead. The point plate ground wire had broken in the past an someone replaced it with what appeared to be 10 ga. single strand house wire, wrapped with some electrical tape. Wouldn't want that vacuum advance to work, now would we? Made a new one from solder wick.
- 1 x DTB150 Points and Condensor Set (Lucas)
- 1 x 54-413549 Low Tension Lead (Lucas)
- ~3 in. Size 3 Solder Wick
New cap, rotor, and wire set. Of course no one had MGC wires so I cut down a set for a Chevy 250 L6 that I got at Pep Boys. (Borg Warner Select CH624, 7mm). Seems like good quality wire. The plug boots were straight, so while I was shortening the wires I used 90? boots and connectors. I measured the wires by guesstimate since the old wires were obviously a generic set. I've since bagged a parts book and it says the proper lengths are:
- #1 14 1/2 in. (37 cm)
- #2 12 in. (31 cm)
- #3 9 in. (23 cm)
- #4 5 in. (13 cm)
- #5 4 in. (11 cm)
- #6 8 1/2 in. (22 cm)
- King Lead 15 1/2 in. (40 cm)
- 1 x DDB117 Distributor Cap
- 1 x DRB106C Distributor Rotor
- 6 x (NAPA) 727406 90º Boot
- 6 x (NAPA) 727006 90º Connector
New spark plugs (NGK BP6ES).
Shot a little ether in and tried it. Nothing. Did compression test, showed:
- #1 - 75 psi
- #2 - 135
- #3 - 70
- #4 - 65
- #5 - 20
- #6 - 50
A little oil in the cylinders did nothing to raise the compression, so I figured that the valves were probably a little rusty on the seats and I had nothing to lose by continuing to try it. Either the head would have to come off or not. Eventually got it to fire a little on ether. Quit while I was ahead.
Ordered rebuilt water pump and hoses.
Pulled radiator, surrounding sheet metal, and water pump. Cleaned and derusted sheet metal via electrolysis. It did a great job!
-
November
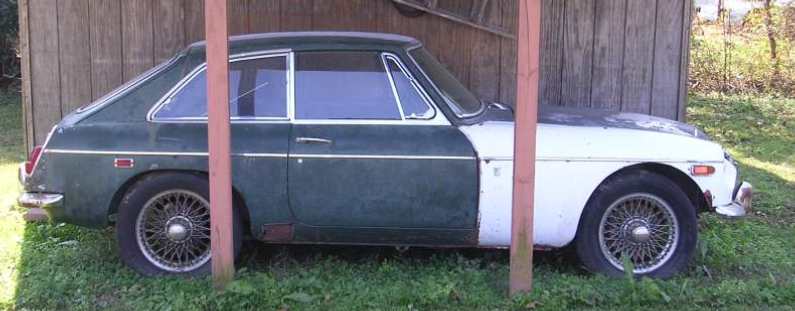
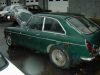
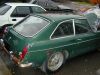
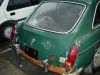
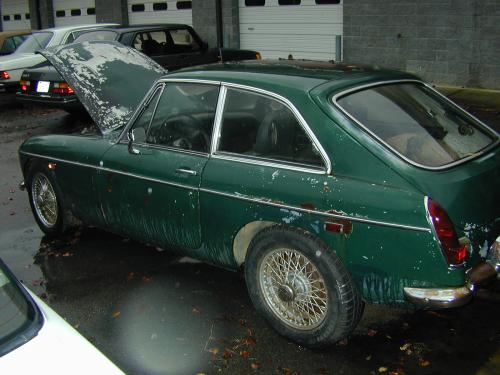
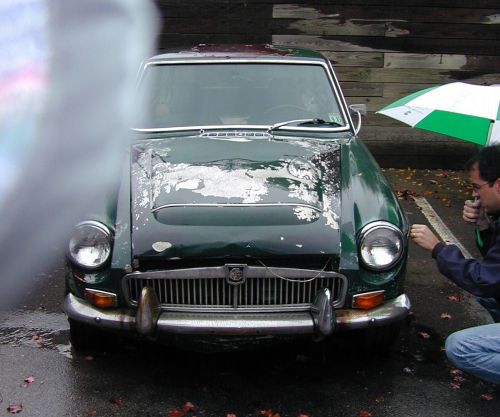
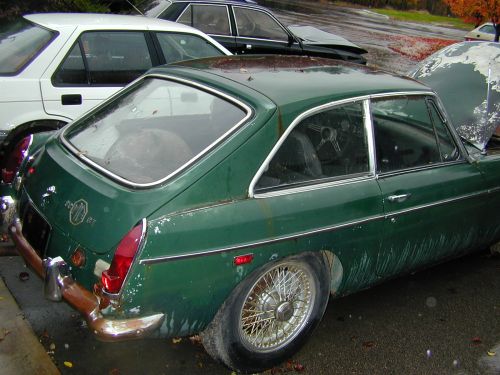
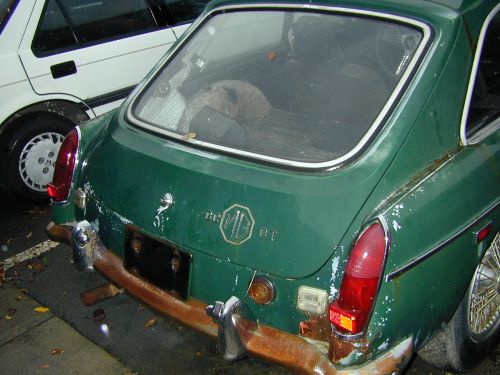
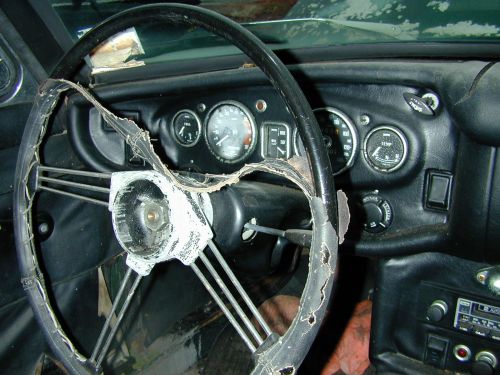
Bought the car!
Here's my 1969 MGC GT as it looked when I first saw it. It was at a foreign car shop. The previous owner had signed it over to the shop rather than pay to have it fixed. The shop owner told me it needed brake work when brought to him in about 1990. (I don't doubt it -- it's missing one of its boosters and the other has been bypassed. In addition, the bonnet and grille are a bit crunched. Coincidence?) That's my buddy Bryan inspecting the Bondo. This whole thing is his fault. ;-)


